Acrylic nails are the beauty world’s epitome of glamour, and pretty much anyone with eyeballs can see that. However, are acrylic nails safe to use? Are artificial nails painful? How much do acrylic nails cost? How much do acrylic nails cost at Salon? And what exactly are fake nails made of? If you’re wondering about acrylics and have never experienced them, it’s only natural to have some worries about the cosmetic procedure.
Determine whether acrylic nails are suited for you by reading our answers to all your questions about the distinctive manicure below. And then be inspired by some of the loveliest acrylic nails available online today.
What exactly are Acrylic Nails?
According to Nails magazine, acrylic nails are nail extensions created by blending a liquid acrylic solution with a powdered acrylic product. The two components (known as a monomer and a polymer, respectively) combine to produce a softball formed into the shape of a nail. When a nail technician puts this acrylic to a client’s nails, it hardens and becomes significantly more robust. Then it may be polished and filed to the customer’s specifications.
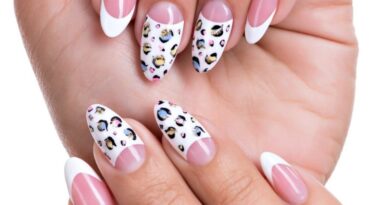
8 Adorable Short Acrylic Nails to Copy
1. Pastel Delight
Pastel Delight nails offer a charming and soft aesthetic, perfect for those who crave a subtle yet delightful manicure. The key is to embrace pastel hues like baby pink, mint green, or lavender, creating a palette that exudes a sweet and feminine vibe. These short acrylic nails can be adorned with simple designs, such as tiny flowers or minimalist patterns, to enhance their overall elegance. Whether you prefer a single pastel shade or a combination for a playful twist, Pastel Delight nails are a versatile and adorable choice that brings a touch of whimsy to your fingertips.
2. Minimalist Chic
Minimalist Chic nails redefine sophistication with a clean and understated allure. Opting for a minimalist approach, these short acrylic nails showcase simplicity at its finest. Choose neutral tones like nude, beige, or clear acrylic for a timeless and versatile look. The absence of intricate designs allows for a sleek and modern appearance that effortlessly complements any outfit or style. Minimalist Chic nails are not only elegant but also low-maintenance, making them an ideal choice for those who appreciate a refined and uncluttered aesthetic on their fingertips.
Also Read- How to dry nail polish faster?
3. Glitter Glam
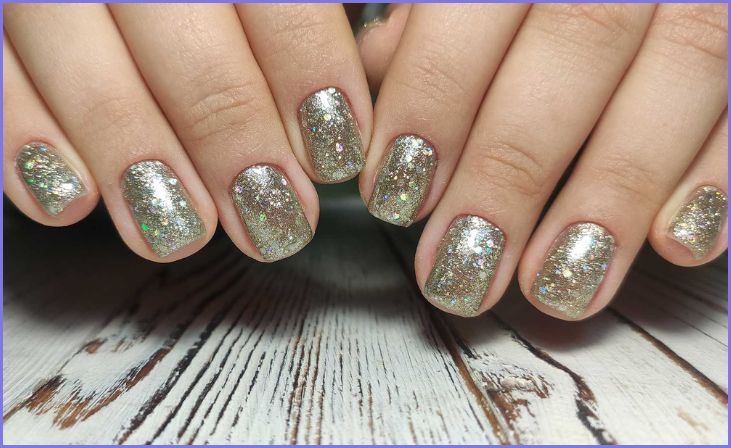
Glitter Glam nails bring a touch of sparkle and allure to your fingertips. These short acrylic nails embrace the dazzling charm of glitter, creating a manicure that’s both playful and glamorous. Whether you choose a subtle glitter accent on one nail or opt for an all-over shimmer, the result is a dazzling and eye-catching effect. Glitter Glam nails are perfect for those who want to add a hint of glamour to their look, making a statement without being overly bold. Whether for a special occasion or just to elevate your everyday style, these nails are a sparkling choice for those who love a touch of dazzle.
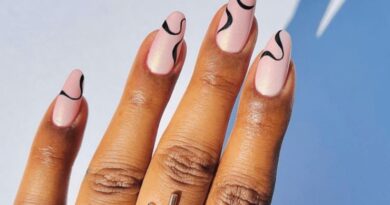
4. French Tip Elegance
French Tip Elegance nails exude timeless sophistication with a modern twist. This nail style takes the classic French manicure to new heights on short acrylic nails. Instead of the traditional white tips, you can experiment with various color combinations or introduce a contemporary element, like colored tips or negative space designs. The result is a chic and refined appearance that effortlessly complements any outfit or occasion. French Tip Elegance nails offer a perfect balance between traditional elegance and a fresh, contemporary aesthetic, making them a versatile choice for those who appreciate a polished and stylish manicure.
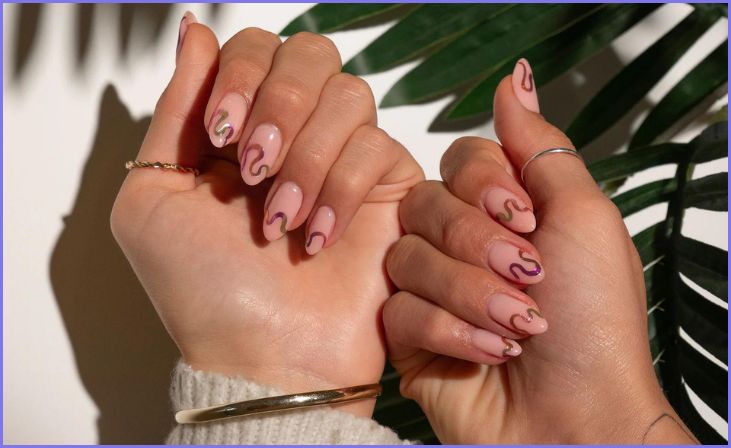
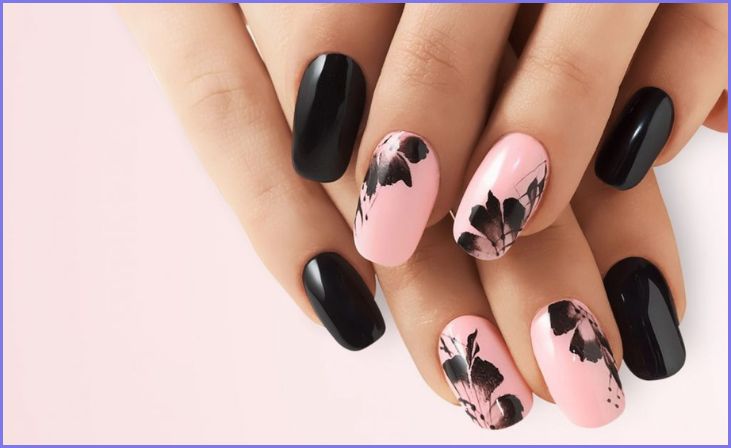
5. Floral Delicacy
Floral Delicacy nails are a beautiful ode to nature, infusing a touch of femininity and charm into your manicure. These short acrylic nails showcase intricate floral designs, ranging from delicate blooms to blossoming bouquets. The artistry of Floral Delicacy nails allows you to embrace the beauty of nature right at your fingertips. Whether you opt for a subtle floral accent on one nail or go for a more elaborate design on all, the result is a manicure that exudes grace and elegance. Perfect for any season, Floral Delicacy nails bring a sense of freshness and natural beauty to your hands, making them a delightful choice for those who appreciate a touch of florals in their nail art.
6. Geometric Vibes
Geometric Vibes nails offer a contemporary and artistic flair to your short acrylic manicure. This style embraces the playful world of shapes and patterns, allowing for creative and eye-catching designs. Experiment with triangles, lines, or abstract geometric arrangements to achieve a trendy and modern look. Geometric Vibes nails provide a canvas for expressing your artistic side, and the possibilities are endless. Whether you prefer a minimalist approach or bold and intricate designs, these short acrylic nails with geometric vibes are a chic and stylish choice for those who want to make a fashion-forward statement with their nail art.
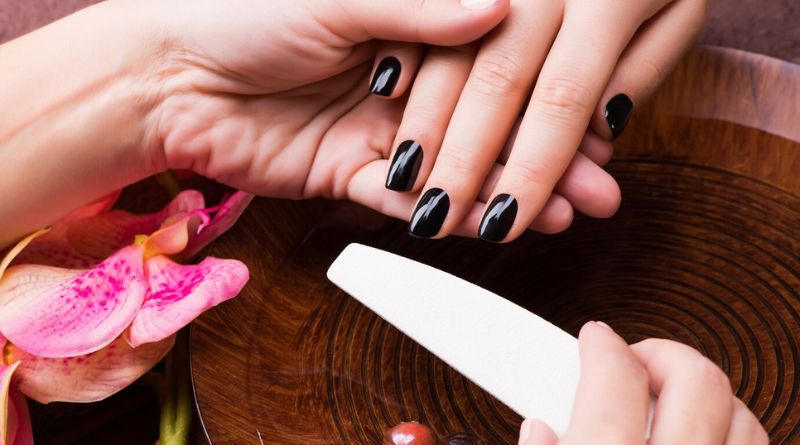
7. Matte Magic
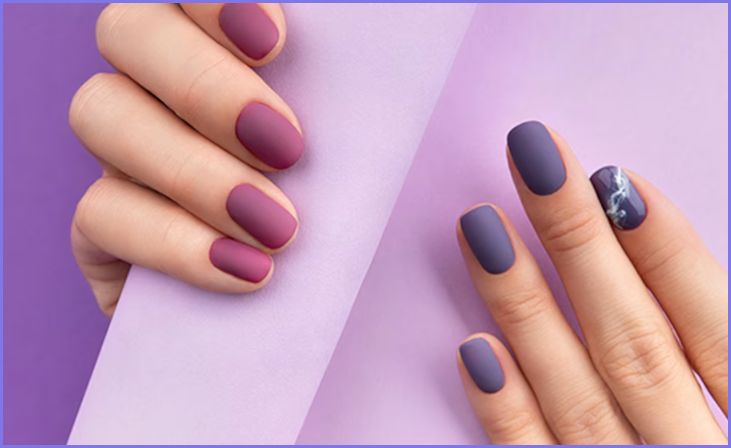
Matte Magic nails bring an understated yet sophisticated allure to short acrylic manicures. This style involves opting for a matte finish, departing from the traditional glossy look. Choose bold shades like deep burgundy or classic black for a chic and modern appearance. The matte texture adds a touch of elegance and edge, creating a subtle contrast that captures attention. Matte Magic nails are perfect for those who appreciate a sleek and refined aesthetic, offering a unique twist to the classic glossy manicure. Whether for a formal event or everyday chic, these short acrylic nails with a matte finish exude a sense of contemporary style and sophistication.
8. Playful Popsicles
Playful Popsicles nails infuse a whimsical and vibrant energy into short acrylic manicures. This lively and fun style takes inspiration from the playful world of popsicles, featuring vibrant colors and cute designs like ice creams or popsicles on each nail. The result is a cheerful and lighthearted manicure that adds a touch of joy to your fingertips. Playful Popsicles nails are perfect for those who love experimenting with bold and lively colors, creating a sense of summer fun that lasts all year round. Whether you choose a mix of fruity shades or stick to a cohesive theme, these short acrylic nails are a delightful choice for those who want their manicure to radiate positivity and playfulness.
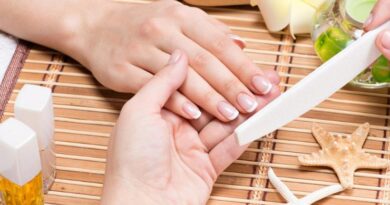
How to Apply Acrylic Nails?
Your technician should begin your acrylics visit by washing, soaking, and filing your natural nails after you select your ideal nail shape, length, and color. Artificial tips will be applied once your nails have been lengthened if you ordered this service. (This step will be omitted if you specify very short acrylic nails.) Next, nail technicians will apply an adhesive to all of your nails before affixing artificial nails. After that, the acrylics are sanded and shaped. In the last step, they use any additional polish, accessories, or nail art you requested during your first session.
The at-home application of nails is dependent on the sort of product you’re using. Fortunately, most kits, such as Kiss Products Salon Acrylic French Nail Kit provide instructions on how to safely and successfully perform acrylic nails on your own (without the assistance of a professional).
| Product | Detail | Price |
|---|---|---|
Acrylic French Nail Kit |
| Buy Now |
How To Take Off Acrylic Nails Without Acetone
Taking off acrylic nails without acetone is possible with a few alternative methods. Here’s a guide on how to do it:
1. Gather Your Supplies
Gathering your supplies is the first crucial step in the process of removing acrylic nails without acetone. Start by collecting a few essential tools to ensure a smooth and effective removal. Grab a quality nail clipper to trim down the length of your acrylic nails, making them more manageable for the removal process. Additionally, have a reliable nail file on hand to gently file the shiny surface of the acrylics, breaking the top coat for easier penetration during removal. Prepare a bowl of warm, soapy water for a soothing soak, which helps to soften the acrylic.
Lastly, ensure you have cuticle oil and a gentle moisturizer ready to nourish your nails and surrounding skin post-removal, minimizing any dryness caused by the process. Having these supplies organized and within reach ensures a more efficient and comfortable acrylic nail removal experience.
2. Trim the Length
After gathering your supplies, the next step in removing acrylic nails without acetone is to trim the length. Utilize a high-quality nail clipper to carefully cut down the extended tips of your acrylic nails. This initial trimming not only makes the nails more manageable during the removal process but also reduces the overall surface area, facilitating a smoother and quicker removal.
Exercise caution while clipping to avoid cutting into your natural nails and ensure a neat, uniform length across all the acrylics. Trimming the length is a practical and essential preparatory step that sets the stage for the subsequent phases of acrylic nail removal without the use of acetone.
3. File the Surface
Following the trimming of the length, the next crucial step in removing acrylic nails without acetone is to file the surface. Take a reliable nail file and gently work on the shiny surface of the acrylic nails. This filing process serves a dual purpose: it helps break the top coat of the acrylic, making it more permeable to subsequent removal methods, and it smoothens any sharp edges resulting from the initial trimming.
Exercise care during this step to avoid excessive filing, ensuring that you only remove the top layer of the acrylic without causing damage to your natural nails underneath. Filing the surface prepares the acrylic nails for the subsequent removal steps, enhancing the effectiveness of the overall process.
4. Warm Water Soak
The warm water soak is a pivotal step in the process of removing acrylic nails without acetone. After trimming the length and filing the surface, immerse your hands in a bowl of warm, soapy water. Allow your acrylic nails to soak for approximately 15 to 20 minutes. The warm water serves to soften the acrylic material, making it more pliable for removal.
This soaking process helps break down the adhesive used to attach the acrylic nails, facilitating a gentler and less abrasive removal. It also provides a soothing experience, easing any discomfort associated with the removal process. Ensure the water is comfortably warm, and take this time to relax while preparing the acrylics for the next phase of removal.
5. Gentle Peeling
Once the acrylic nails have sufficiently soaked in warm water, the next step in the acetone-free removal process is gentle peeling. Begin by attempting to peel off the softened acrylic layer gently. Start at the edges, carefully lifting the acrylic from your natural nails. If the acrylic doesn’t readily peel off, do not force it. Instead, repeat the soaking process until the material loosens further.
Exercise patience and take your time during this step to avoid causing damage to your natural nails. The goal is to remove the acrylic layer with minimal resistance, ensuring a smoother and more comfortable process overall. If needed, use a gentle tool like an orange stick to aid in the peeling process, taking care not to apply excessive force.
For More- How to dry nail polish faster?
6. Moisturize and Care
After successfully removing the acrylic nails, the final step in the acetone-free process is to moisturize and provide proper care for your nails and surrounding skin. Apply a generous amount of cuticle oil to nourish the nail bed and the cuticle area. This helps replenish moisture and promotes the health of your natural nails. Follow up with a gentle, hydrating moisturizer to soothe the skin around your nails.
The removal process can sometimes leave the nails and surrounding areas feeling dry, so this step is crucial for restoring moisture and preventing any discomfort. Regular application of cuticle oil and moisturizer in the days following removal will contribute to the overall health and well-being of your natural nails.
Price of Acrylic Nails at a Salon
The cost of getting acrylic nails at a salon can vary based on factors such as the salon’s location, reputation, and the specific services offered. On average, you can expect to pay between $25 and $80 for a full set of acrylic nails. This price typically includes the application of the acrylic material and basic nail art or polish.
Additional factors that might influence the cost include the salon’s expertise, the complexity of the design, and whether you choose extras like nail extensions, 3D designs, or specialty finishes. Some high-end salons or those located in metropolitan areas may charge more for their services.
It’s advisable to inquire about the salon’s pricing structure beforehand and to consider any potential extra costs for maintenance or additional nail art. Keep in mind that prices can vary, and it’s essential to choose a salon that aligns with your budget and offers the level of expertise and service you desire.
How Much Does It Cost to Remove Acrylic Nails?
The cost of removing acrylic nails at a salon varies, but it typically falls within the range of $10 to $20. Many salons offer removal as a standalone service or may include it at a reduced price if you initially had the acrylic nails applied at the same salon. The price can depend on factors such as the salon’s location, its pricing structure, and the complexity of the removal process.
Some salons may charge less if you’re getting a new set of acrylic nails applied immediately after the removal. However, it’s essential to clarify the cost with the salon before the removal process begins to avoid any surprises.
While professional removal is a common choice, you can also remove acrylic nails at home using acetone or other methods. If you choose the DIY route, the cost will be significantly lower, as you’ll mainly need to purchase the necessary supplies.
Conclusion
In the realm of nail enhancements, acrylic nails stand out as a popular choice, offering durability and versatility for those seeking a long-lasting and stylish manicure. Understanding the application, maintenance, and removal processes is crucial for making informed decisions about acrylic nails. From the initial appointment at the salon to proper care at home, this guide has covered the essentials to ensure your acrylic nail experience is both enjoyable and satisfying. Remember to prioritize nail health, choose a skilled technician, and explore various designs to express your unique style.
FAQs
Acrylic nails typically last 2 to 3 weeks before requiring a fill or maintenance appointment.
When applied and removed correctly, acrylic nails should not cause significant damage to natural nails. It’s crucial to follow proper care procedures.
Yes, acrylic nails can be applied to short natural nails, providing a longer and more polished appearance.