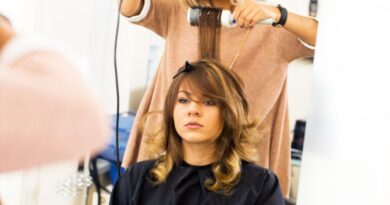

How to Achieve a Perfect Hair Blowout at Home – Achieving a perfect hair blowout at home is not only a time and money-saving endeavor but also a fantastic way to enjoy salon-quality results in the comfort of your own space. A well-executed blowout can transform your hair, leaving it voluminous, shiny, and impeccably styled. Whether you have a special event or simply want to look your best every day, mastering the art of the at-home blowout is a valuable skill.
In this guide, we will walk you through the steps to achieve a flawless hair blowout at home. From preparation to technique and finishing touches, we’ll provide you with the tips and tricks you need to achieve a professional look. With the right tools and techniques, you can enjoy the benefits of a perfect hair blowout and take your hairstyling to the next level. So, let’s get started and make your home your personal salon!
How much is a blowout?
The cost of a professional blowout can vary significantly depending on various factors, including your location, the salon’s reputation, and the specific services offered. On average, a blowout can range anywhere from $30 to $90 or more in the United States. In upscale salons or major cities, the cost may be on the higher end of this range.
It’s important to note that some salons offer blowout packages or memberships that can provide a more cost-effective way to enjoy regular blowout services. Additionally, prices may vary based on the stylist’s experience and expertise.
Keep in mind that prices can change over time, so it’s a good idea to check with your local salons or hairstylists for their current pricing and any special offers they may have.
Also, Read – Benefits of Using Bananas for Hair Care
How to Achieve a Perfect Hair Blowout at Home

Start with clean hair
To achieve a perfect hair blowout at home, start with clean, freshly washed and conditioned hair. Make sure your hair is not too wet, as it should be damp but not dripping. Clean hair provides a smooth canvas for styling, and applying a heat protectant is essential to safeguard your hair from heat damage during the blow-drying process. By beginning with clean, protected hair, you’ll set the foundation for a flawless and long-lasting blowout.
Use a heat protectant
Using a heat protectant is crucial for maintaining the health and integrity of your hair during a blowout. Choose a quality heat protectant product and apply it evenly to your hair, focusing on the mid-lengths and ends. This protective barrier shields your hair from the intense heat of the hair dryer, minimizing the risk of damage, such as dryness, split ends, and breakage.
A heat protectant also helps to lock in moisture and maintain your hair’s natural shine, ensuring that your blowout not only looks perfect but also keeps your hair in excellent condition. Always follow the product’s instructions for best results.
Section your hair
Sectioning your hair is essential for achieving a perfect blowout. Use clips or hair ties to divide your hair into manageable sections. Start by creating a part down the middle of your head, separating it into two sections. Then, further divide each side into smaller sections. Typically, you’ll have four to six sections in total, with more for thicker or longer hair.
Working with smaller sections allows you to focus on each part individually, ensuring that every strand is properly dried and styled. This approach helps you achieve a more even and polished look, as well as adding volume and control to your hair during the blow-drying process.
Also, Read – Natural Haircare Tips for Strong and Healthy Locks
Choose the right tools
Selecting the right tools is crucial for a perfect hair blowout. Here’s what you’ll need:
- Hair Dryer: Invest in a high-quality hair dryer with variable heat and speed settings to give you control over the styling process. Make sure it has a concentrator nozzle for precise airflow.
- Round Brush: Choose a round brush with bristles suitable for your hair type and length. For shorter hair, a smaller brush works, while longer hair benefits from a larger brush.
- Clips or Hair Ties: Use these to section your hair, making it easier to work with smaller portions at a time.
- Heat Protectant: This is essential to shield your hair from heat damage. Look for a product that suits your hair type and texture.
With the right tools, you’ll be well-equipped to achieve a salon-quality blowout at home.
Start with the roots
To begin your perfect hair blowout, start at the roots. After sectioning your hair, take a section and lift it with your round brush, positioning the hair dryer close to the roots. Apply heat and gently pull the brush and dryer downward, moving from the roots towards the ends. This technique lifts the hair at the roots, adding volume and ensuring that the roots are thoroughly dried.
Continue this process section by section, working your way around your head. Paying extra attention to the roots is essential for achieving the volume and lift characteristic of a great blowout. Be patient and repeat the process until the roots are dry and styled to your liking.
Use proper brushing technique
Using the right brushing technique is essential for a perfect hair blowout. After starting at the roots, gently pull the hair taut with your round brush, keeping it in close proximity to the hair dryer. Use slow, controlled movements, following the brush with the dryer as you move down the hair shaft. This technique smooths the hair, reduces frizz, and imparts a sleek look.
For added bounce, consider rolling the brush under at the ends. Be patient and ensure that each section is adequately dried and styled, working your way around your head. By employing this method, you’ll achieve a salon-quality blowout with a polished and professional finish.
Adjust the heat and speed settings
Optimal heat and speed settings are key to a successful hair blowout. Consider your hair type and thickness:
- Heat Settings: For thin or fine hair, use lower heat to prevent damage. Medium heat is suitable for most hair types. If you have thick or coarse hair, you can opt for higher heat.
- Speed Settings: Use a lower speed setting for more precise control, especially near the roots. Higher speeds are useful for quickly drying larger sections.
Start with medium heat and adjust as needed during the blowout. It’s crucial to avoid overheating your hair, so monitor your hair’s response to the heat, and always keep the dryer moving to prevent excessive exposure in one spot. These adjustments will help you achieve a safe and effective blowout.
Cool down
Cooling down your hair after blow-drying is a crucial step to set your style and ensure it lasts. Most hair dryers come with a cool shot button. To cool down your hair, simply switch to the cool setting and run the dryer over your styled hair for a minute or two.
This helps to close the hair cuticles and lock in your style. It also reduces frizz and adds shine to your hair. Cooling down is essential for making your perfect blowout last longer and look polished.
Finish with a hair spray
To complete your perfect hair blowout, apply a light-hold hair spray. Hold the spray can about 12 inches away from your head and mist it evenly over your styled hair. This will help set your style, prevent frizz, and add a touch of shine.
Make sure not to overdo it; a light-hold spray will maintain your hair’s natural movement while ensuring your blowout stays in place throughout the day. For extra longevity, you can also use a humidity-resistant hair spray if needed, especially in humid climates. Remember that less is often more with hair spray to avoid a stiff or sticky feel.
Add any final touches
After finishing your blowout, consider these final touches for a flawless look:
- Hair Serum or Oil: Apply a small amount of hair serum or oil to your fingertips and run it through your ends for added shine and a polished finish. This helps to control frizz and provides a sleek appearance.
- Flat Iron or Curling Iron: Use a flat iron or curling iron to touch up any areas that need extra smoothing or curl definition.
- Hair Accessories: Add hair accessories like clips, pins, or headbands to enhance your style or create a more intricate look.
- Teasing or Backcombing: If you desire extra volume at the crown, gently tease or backcomb your hair for a lift.
By incorporating these final touches, you can customize your blowout to your liking and achieve a perfect, salon-quality result at home.
Conclusion
In conclusion, achieving a perfect hair blowout at home is an attainable skill that can save you time and money while giving you salon-quality results. With the right tools, products, and techniques, you can enjoy the benefits of a beautifully styled and voluminous hair.
Practice, experimentation, and the use of heat protection are essential. So, make your home your personal salon, and enjoy the confidence and convenience of a flawless blowout whenever you desire. Your hair will thank you for it!
FAQs
A hair blowout is a hairstyling technique that involves using a hairdryer and a round brush to create smooth, voluminous, and polished hair. It’s popular because it gives your hair a salon-quality finish.
Yes, you can achieve a great blowout at home with practice and the right techniques. It doesn’t require professional training, but it does require some skill.
You’ll need a hairdryer with a concentrator nozzle, a round brush, heat protectant spray, hair clips, a hairbrush, hair ties, and optional products like volumizing mousse and hair serum.